Guide to Solar Panels Mounting Structures
In a world increasingly focused on renewable energy, solar power is taking center stage. With its vast population and sunshine hours, is poised to become a leader in solar energy adoption. This surge in solar panel usage creates a vital need for strong, reliable Solar Panels Mounting Structures.
But what exactly are solar panels mounting structures, and why are they so crucial? This comprehensive guide will delve into everything you need to know about these silent workhorses of the solar industry.
The Backbone of Solar Power Plants: Understanding Mounting Structures
Solar panels mounting structures are the unseen foundation of any solar power plant. These frameworks provide essential support for the solar panels, tilting them at the optimal angle to capture the maximum amount of sunlight throughout the day. Without them, panels wouldn’t be able to absorb enough sunlight to generate significant amounts of solar energy.
Structural integrity is paramount. A perfect mounting structure transcends mere weight support. It needs to be robust enough to withstand the harshest weather conditions, including high winds, heavy snow loads, and even flooding. To achieve this, these structures are typically crafted from high-strength, durable materials like aluminum or stainless steel, ensuring they can endure the elements for decades.
Choosing the Right Mount: A Guide to Different Types
Selecting the right type of mounting structure is crucial for optimizing solar panel performance and maximizing energy production. Here’s a breakdown of the five most common mounting structures:
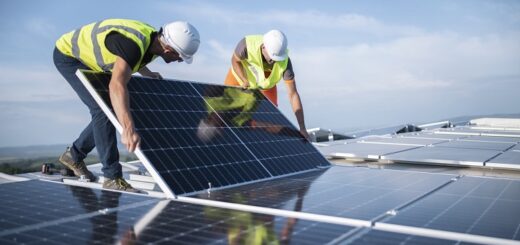
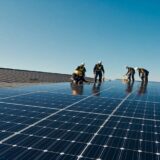
Roof-Mounted Racks: These racks are ideal for homes and businesses with suitable rooftops. They minimize the distance between solar panels and the inverter, reducing energy loss. Roof mounts require penetrating the roof, so proper sealing is essential to prevent leaks. They can be fixed or adjustable, with some even featuring solar trackers for optimal sun exposure.
Ground-Mounted Racks: Shine bright wherever you are! Ground-mounted racks are the go-to choice for locations with plenty of ground space. These adaptable structures allow you to adjust the tilt of your panels for optimal sun exposure at any time of day. Open fields and vacant land become prime real estate for generating clean energy with ground-mounted racks.
Top-of-Pole Mounted Racks:
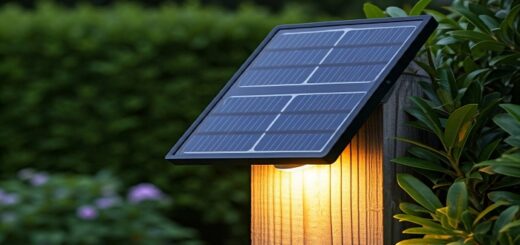
As the name suggests, these racks are mounted on top of poles. They are available in two configurations: top pole and side pole. Top pole mounts allow for a single row of panels positioned directly above the pole. Side pole mounts can accommodate a small number of panels attached to the side of the pole. These are commonly used for remote lighting systems.
Side-of-Pole Mounted Racks: These space-saving racks are designed for a limited number of solar panels. They are ideal for powering remote lighting systems and come pre-attached to poles for easy installation.
Tracking-System Mounted Racks: TThese cutting-edge mounts pair with solar tracking systems, which are like tiny robotic sun trackers that automatically adjust the panels’ position throughout the day to maximize sunlight capture. Tracking systems come in two types: single-axis (tracks east to west) and dual-axis (tracks east to west and north to south). While offering maximized efficiency, tracking systems are generally more expensive and require maintenance due to their motorized components.
Building Blocks of a Solar Mounting System: A Closer Look
A solar mounting structure is comprised of several key components that work together to securely hold the panels in place. Here’s a breakdown of these essential elements:
- Solar Panel Mounting Brackets: These heavy-duty brackets, typically made of aluminum or stainless steel, form the backbone of the mounting system. They need to comply with industry standards to ensure structural integrity.
- Solar Panel Mounting Clamps: Rooftop mounting clamps, specifically designed for this purpose, securely grip the solar panel frame using stainless steel set screws.
- Solar Panel Mounting Strut Channel: These channels work alongside rails, clamps, and other fittings to create the framework of the mounting structure. They essentially act as connectors, transferring weight between different components.
- Solar Panel Mounting Screws: These screws play a vital role in securing the panels to the mounting structure. The number and placement of screws directly impact how much sunlight the panels capture. Proper positioning ensures minimal sunlight is wasted around the panel edges.
Installing Solar Panels on Your Roof: A Step-by-Step Guide
The installation process necessitates specialized tools and techniques in the hands of trained professionals to ensure your solar panels function optimally and remain securely fastened for years. Here’s a simplified overview of the general installation process, keeping in mind that specific steps may vary depending on your roof type:
1. Gather Your Supplies: Before you begin, ensure you have all the necessary tools, including a drill, drill bit, pencil, chalk line, tape measure, and ladder. Your solar panel shipment will include most of the additional components you’ll need for installation.
2. Positioning the Stanchions: For optimal sunlight capture, solar panels typically need to be tilted at an angle of at least 18 degrees.Strategic placement of the stanchions, the support structures for the panels, is crucial to achieve the optimal angle for sun capture while ensuring they can withstand strong winds and prevent panels from being ripped off the roof.
- Locate the rafters in your roof by consulting your home’s blueprint, if available. Rafters are the horizontal beams that provide structural support for your roof.
- Secure the stanchions to the rafters using heavy-duty screws. The spacing between stanchions is typically around 4 feet.
- Important Note: To ensure the safety and longevity of your solar investment, consider hiring a professional solar installer if you’re unsure about your roof structure or lack experience with roof work. They possess the expertise and tools to handle the installation flawlessly.
3. Flashing Installation:
Flashing is a waterproof material placed under the shingles where the stanchions penetrate the roof. Here’s how to install flashing:
- Carefully remove shingles at the designated locations for the stanchions.
- Slide the flashing beneath the remaining shingles and secure it to the rafters with bolts. The flashing includes a seal around the bolt holes to prevent water leaks.
4. Attaching the Rails: Rails are horizontal bars that run along the length of the stanchions and support the solar panels. Here’s how to attach them:
- Insert screws into the pre-drilled holes on the stanchions and rails. Tighten the screws securely.
- Ensure the upper and lower rails are parallel to each other. Use a tape measure to check the diagonal distance between opposite ends of the rails. Adjust the rails if necessary.
5. Placing the Middle Rail:
A middle rail provides additional support for the solar panels. Here’s how to install it:
- Use a tape measure to locate the center point of the solar panel array.
- Position the middle rail along the length of the stanchions, ensuring it’s centered on the array.
6. Running the Wires: Connecting the solar panels to the inverter (the device that converts DC electricity from the panels to usable AC electricity) requires proper wiring. Here’s what to keep in mind:
- Use a power inverter kit specifically designed for solar panels. These kits typically include copper wires.
- Connect the wires from each panel to the inverter and the electrical meter/sub-panel.
7. Mounting the Panels: Once the wiring is complete, it’s time to secure the solar panels to the mounting structure. Here’s how:
- Attach retaining clips to the rails. These clips will hold the panels in place.
- Carefully lift and position each panel onto the rails and secure them with the retaining clips.
8. Safety First: Solar panel installation can be complex and involve working at heights. Always prioritize safety by following all recommended guidelines and using proper safety equipment. If you are uncomfortable performing the installation yourself, consider hiring a certified solar installer to ensure a safe and proper installation process.
Choosing the Right Mounting Material: Durability Matters
The material used for your solar panel mounting structure is a crucial decision. Here’s a breakdown of the most common materials and their pros and cons:
- Aluminum: This lightweight and corrosion-resistant material is the most popular choice due to its affordability, strength, and compatibility with aluminum solar panel frames.
- Stainless Steel: While slightly more expensive than aluminum, stainless steel offers superior strength and resistance to harsh weather conditions.
- Wood: A low-cost option, wood is easy to work with but lacks durability and can deteriorate quickly, especially in moist environments.
- Plastic: Skip the plastic fantastic! While tempting for the wallet, plastic just can’t handle the job. Its weakness and susceptibility to breaking under pressure make it a risky choice for solar panels mounting structures.
- Iron: Relatively inexpensive and easy to install, iron is susceptible to rust and not ideal for wet environments.
When selecting a mounting material, prioritize durability and long-term performance. Consult with your solar panel installer or manufacturer for recommendations based on your specific location and weather conditions.
Conclusion: A Brighter Future Powered by Solar Energy
As the world increasingly adopts renewable energy sources, solar power stands out as a leader in creating a cleaner and more sustainable future. Let’s join the movement and harness the sun’s power, one solar panel at a time, to illuminate a brighter tomorrow. solar panels mounting structures.


