Solar Panel Installation Process: Step-by-Step
Solar panels are becoming popular. They offer a clean and renewable energy source. Installing them can seem complicated. This guide will break down the process. Solar Panel Installation Process Step-by-step, you will understand each part.
Why Install Solar Panels?
Solar panels save money. They reduce electricity bills. It also help the environment. Solar energy is renewable. It reduces reliance on fossil fuels. Many people are choosing to go solar. It’s a wise investment.
Step 1: Initial Consultation
The first step is consultation. Contact a solar company. They will evaluate your needs. Discuss your energy goals. The company will assess your property. They will check roof space and sunlight exposure. This helps in creating a suitable plan.
Step 2: Site Assessment
A technician will visit your home. They will inspect your roof. It will check its condition and orientation. They will also note any obstructions. Trees or buildings may cast shadows. This can affect panel efficiency. The technician will measure the roof. They will ensure it can support the panels.
Step 3: Design and Proposal
After the site assessment, the company designs your system. They create a custom plan. This includes panel layout and equipment details. You will receive a proposal. It outlines costs, savings, and timelines. Review it carefully. Ask questions if needed.
Step 4: Financing Options
Solar panels can be expensive. Many companies offer financing options. Loans, leases, and power purchase agreements (PPAs) are common. A loan means you own the system. A lease or PPA means the company owns it. You pay a monthly fee. Consider the best option for your budget.
Step 5: Permits and Approvals
Before installation, permits are needed. The company handles this. They will submit paperwork to local authorities. This includes building and electrical permits. Approval can take a few weeks. Patience is essential here.
Step 6: Ordering Equipment
Once permits are approved, equipment is ordered. This includes solar panels, inverters, and mounting hardware. The company coordinates delivery. Timing depends on supplier schedules. Usually, this takes a few weeks.
Step 7: Installation Day
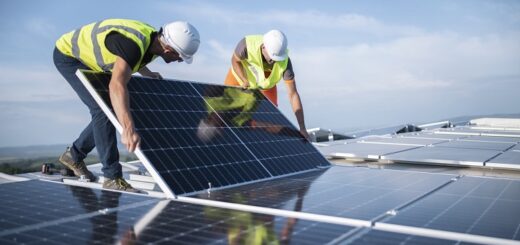
Installation begins. A crew arrives at your home. They start by preparing the roof. This involves attaching mounts. Mounts are secured to roof rafters. They provide a stable base for panels. Next, rails are attached to the mounts. Panels are then secured to the rails.
Step 8: Electrical Wiring
After mounting the panels, electrical work begins. Wires connect the panels to an inverter. The inverter converts DC power to AC power. This is usable in your home. People typically install the inverter near the main electrical panel. Electricians ensure everything is safe and up to code.
Step 9: Connecting to the Grid
The system is now connected to the grid. This step involves coordination with your utility company. A new meter may be installed. It measures the energy you produce and consume. Some areas require an inspection before connecting. This ensures everything is installed correctly.
Step 10: System Testing
The installation is complete. The system is tested. Technicians check each component. They ensure panels are producing power. The inverter and connections are inspected. Any issues are resolved. This ensures optimal performance.
Step 11: Final Inspection and Approval
A final inspection is conducted. Local authorities or the utility company do this. They verify the system meets all regulations. Once approved, you can start using your solar energy.
Step 12: Monitoring Your System
Most systems come with monitoring software. This allows you to track performance. You can see how much energy you produce. Monitoring helps in detecting issues early. It also provides data on savings and efficiency.
Maintenance Tips
Solar panels require minimal maintenance. Regular cleaning is essential. Dust and debris can reduce efficiency. Inspect panels for damage periodically. Check connections and wiring. Hire a professional for an annual check-up.
Benefits of Solar Panels
Solar panels offer many benefits. They reduce electricity bills. increase property value. They also help the environment. Solar energy is clean and renewable. It reduces greenhouse gas emissions. Many people also enjoy the independence it provides. You rely less on the grid.
Common Challenges
Solar panel installation has challenges. Initial costs can be high. Financing options can help. Roof conditions may not be ideal. Structural upgrades may be needed. Permitting can be a lengthy process. Each area has different regulations.
Conclusion
Installing solar panels is a smart investment. It requires planning and patience. Following these steps ensures a smooth process. From consultation to final inspection, each step is crucial. Solar energy offers financial and environmental benefits. Start your solar journey today. Enjoy the rewards of clean energy.


1 Response
[…] Angles: Consult with your installer about the best tilt and angle for your […]